WebIO Android App
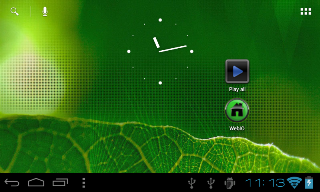
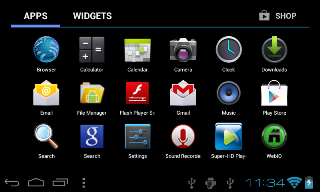
The WebIO Android app for smartphones or tables provides easy control of your WebIO.
Turning your phone or tablet into a remote Internet or local "remote control".
| |

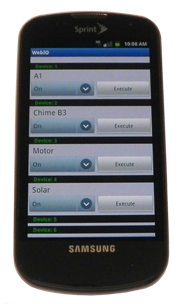
WebIO Android App on a Samsung Galaxy S
|
|


|
| WebIO Android App Download and Install |
Download and Install
For installation, download WebIO Android app from the link below using your Android smartphone.
Then find the file: WebIO.apk in your downloads folder (Browser menu: settings/more/downloads).
You also need to temperarily set your Android device to accept installation of apps not from the Google Play store before installation.
This setting is found in Android Settings Applications/Unknown sources.
Download WebIO Android app v2.0 (WebIO.apk, 215KB, 01/03/2013)
WebIO Android App v2.0 supports Android versions 2.2 Froyo through 4.2 Jelly Bean
App v2.0 adds support for Android 4.1/4.2 Ice Cream Sandwich and Android 4.0 Jelly Bean,
where as WebIO app v1.7 did not work with Android 4.x.
App v2.0 now uses multi-threading for faster and non-blocking connections to WebIO.
Previous WebIO Android App Version Features:
App v1.7 supports the X10 features of all versions of WebIO (v1-4)
Fixes problems with using passcode with WebIO v3.
New to Android app v1.6 is support for reading WebIO v1-4 internal temperature sensor
and reading of three wireless sensor channels of WebIO v3 (wireless temperature version).
App v1.6 also fixes setting of WebIO-version problem of app v1.4.
Download WebIO Android app v1.7 *Old* WebIO.apk, 44KB, 04/11/2011)
Note: It appears that the some versions of the Android web browser (webkit) and the underlying java environment do not support the HTTP header of WebIO.
The Android browser on Android Jelly Bean does work with the WebIO web page interface.
Some older Android web broswers can send control messages to WebIO but will not display the WebIO html web pages.
This has also been found on some versions of Microsoft .NET, although Internet Exporer for PC and mobile works great.
Also on many mobile platforms other than some Android platforms, the Opera Mini browser works great with WebIO.
|
|

Above: Android file systems, find Downloads folder

Above: WebIO.apk Android app install. Select/Install this file/app.
|
|
| WebIO Android App Settings |
Settings
The WebIO app must be configured to connect to your WebIO.
Run the WebIO app and find the Settings screen. Older versions of Android use the devices menu button
(usually the bottem left button on the device) to display the apps menu. New versions of Android (Jelly Bean) place
a menu button in the apps upper right corner. From the apps menu select Settings.
IP or Domain
The IP or Domain setting need to be either the Internet routable IP address to your WebIO or
or the Domain name that points to the IP address of your WebIO. In most cases this IP address is the WAN IP address
of the Internet Router that WebIO is connected to.
For more info on setting up WebIO for Internet access see:
WebIO Setup for Internet Access
Port
Use the Port setting to define the Port used to forward internet access to your WebIO within the router that WebIO is connected
to via Ethernet. If you leave this Port setting blank, the default web server port (80) will be used.
WebIO listens to all port numbers so it does not have a configuration for port setting.
Passcode
If you set a passcode on your WebIO. Enter the passcode here. Note that if you have the passcode wrong there will be
no indication when attempting to send an X10 command. The command will appear to have been successful, so it is best to
test your connection to WebIO on location.
WebIO Version
Different model versions of WebIO have some different means of connecting/commanding WebIO along with different features.
Select your WebIO version from the droplist box. Your WebIO version displayed on the WebIO web interface.
Save
After making changes, select the Save button to write your settings to your device's memory.
Device Settings
This app allows for defining up to 12 X10 devices for easy control from the X10 screen.
Define a Label/Name for you device, Select the X10 House Code and X10 Unit code.
|
|

WebIO Menu (X10, Temperature, Settings)

WebIO Settings Screen
|
|
| WebIO Android App X10 Control |
X10 Control
To command WebIO to control an X10 device, select the command from the
device command drop list box and select the device Execute button.
Commands include On, Off, On-Wait-Off, Off-Wait-On, None. (None is used for special X10 functions).
When selecting Execute, the WebIO app attempts to make and TCP connection to you WebIO.
A status message of "Sending..." for the device will be displayed.
If a TCP connection cannot be established within 8 seconds, then a "Failed" message will be displayed.
After the TCP connection is made the X10 command is sent to WebIO after which a the device status message
is changed to "Command Sent".
Debug
If your having problems connecting to your WebIO, you can check on the URL, HTTP and Status fields in the Settings
screen after attempting to send an X10 command.
The URL field displays the last TCP message sent to WebIO.
If you type this same message into a web browser, WebIO should respond with the same action.
The HTTP field displays the WebIO apps response message from WebIO's internal web server.
The Status field displays app debug messages.

|
|

WebIO X10 Control Screen
|
|
| WebIO Android App - Temperature Monitor |
WebIO Temperature
Read WebIO wireless and internal temperature sensors.
The WebIO app shows the most current temperature readings.
WebIO V2 shows a current reading from the internal WebIO temperature sensor.
WebIO V3 also includes temperature and humidity readings from 3 channels of wireless sensors.
|
|

WebIO app temperature data
|
|
|
|
|